Rust Deployable Snapping Tutorial
Rust’s recent “Friends With Benefits” July update released a new feature known as deployable snapping. The feature allows you to easily and neatly organize your base by quickly snapping deployable next to each other with the click of a button. In this tutorial, we will teach you everything you need to know about the new deployable snapping feature, along with how to use it.

These additions are part of Rust's "Friends With Benefits" Update
Rust Deployable Snapping Modes
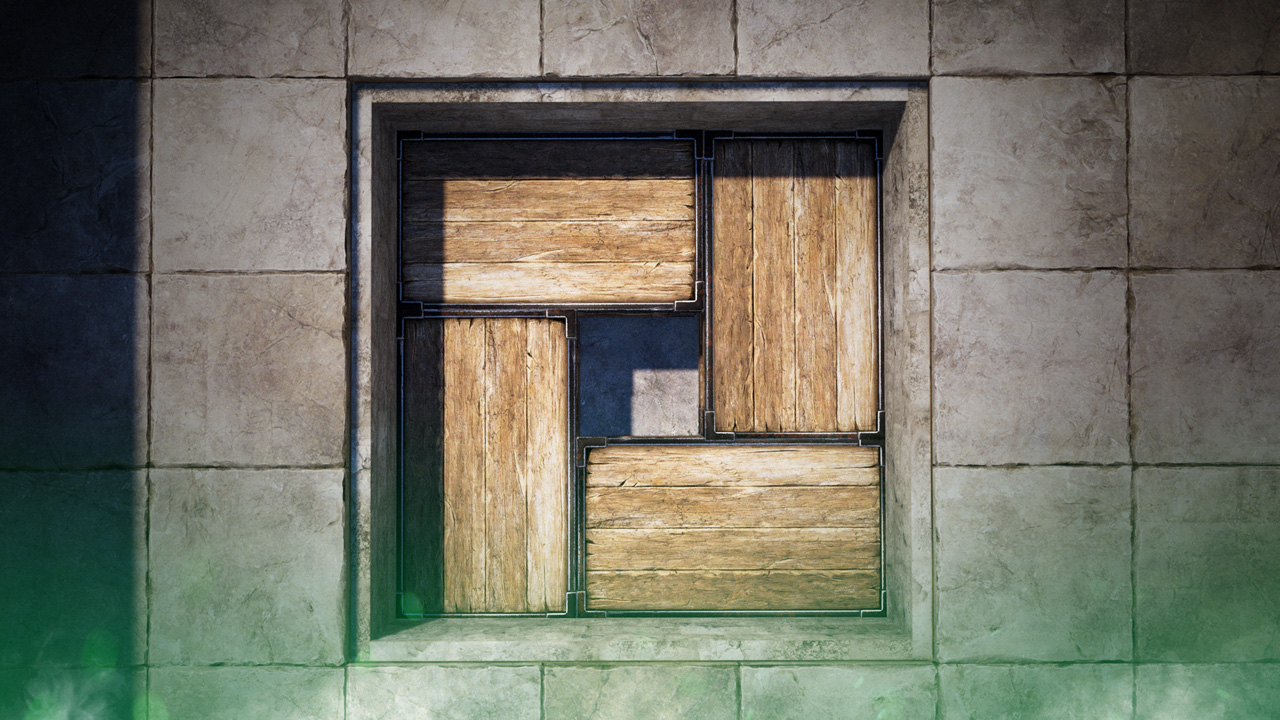
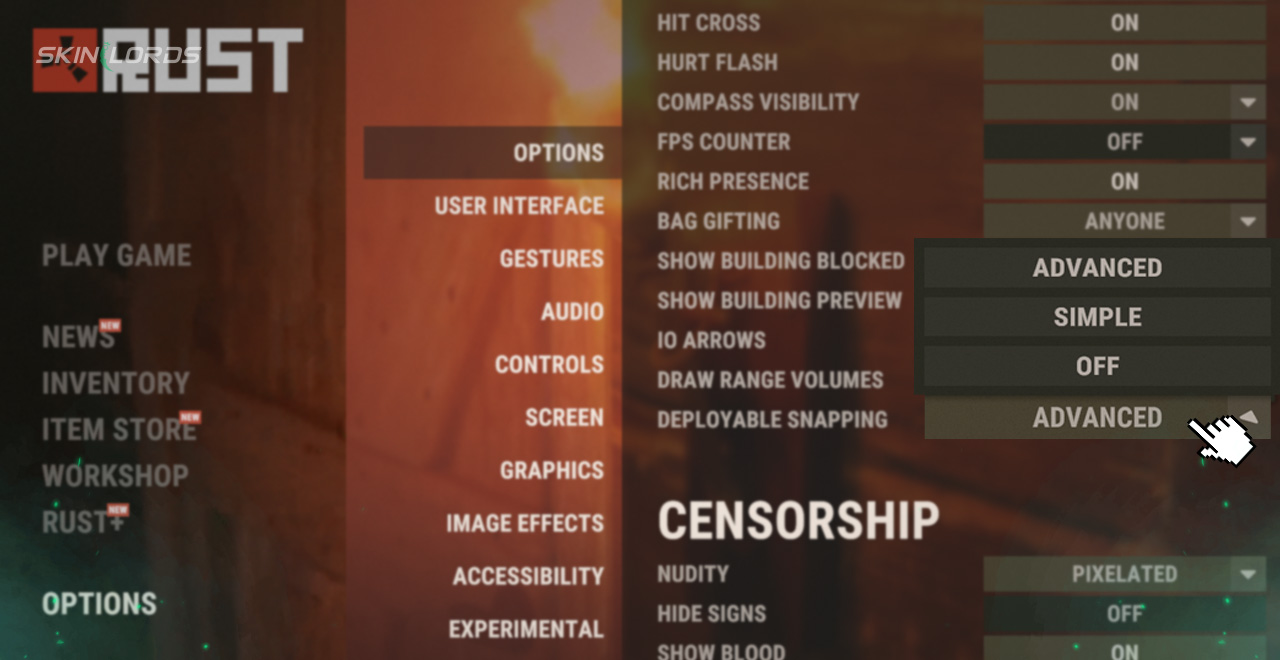
Deployable snapping comes in two separate modes to choose from. Under Options in the settings menu, you’ll find the deployable snapping option, which can be switched from Simple to Advanced. Simple will allow deployables to easily snap to walls and use them as guides, the mode is great for placing your first few deployables and getting a hang of the system. The advanced setting will snap to walls, corners, and other deployable, allowing you to make a tight and compact base by eliminating the gaps in placement caused by human error.
How to Use Deployable Snapping
Now that you’ve decided on the mode of your choice, simply hold out the deployable you wish to place and then hold Left Shift to activate Rust’s deployable snapping. Once activated, the held object will begin to snap into position wherever you attempt to place it. Finally, when you have the object in position, use left click as normal to place the deployable where chosen.
That’s it for our Rust deployable snapping tutorial. Now, your Rust base will be less cluttered than ever before thanks to Rust’s new quality of life feature. If you enjoyed this article, be sure to check out our others such as the new Rust Abyss Pack DLC Additions, or leave a comment below on what we should cover next. See you next time!
Similar Articles
See all
Rust Guides

Rust Mortar New Item Overview
06.13.2026
0
14
Rust Guides
Rust Salvaged Axe and Medical Syringe Receive Remodeled Looks
06.13.2026
0
17
Related Casinos
Leave a reply